Create and use forms
Forms let you collect structured information from people using your assistant. You can use them for intake requests, approvals, file collection, and guided data capture without building a custom integration.
When a person submits a form, Theta Assist adds the response to the chat as a normal message. The assistant can then use that information to continue the conversation or take the next step, such as drafting an email, creating a Planner task, or triggering another form.
In this article
- What forms do
- Before you start
- Quick way to create a form with another assistant
- Add the form to your assistant
- Trigger a form with a quick prompt
- Use separate forms for branching
- Add and configure fields
- Choose how submissions work
- Use forms with file uploads
- Use form outputs in follow-up actions
- Import or export a form
- What happens in chat
- Form availability in chat history
- Limits and validation
- Tips for writing good forms
- After completing the task
What forms do
Forms give your assistant a structured way to ask for information.
You can use forms to collect information like:
- names and contact details
- issue descriptions
- request details
- dates
- links
- file uploads
A form submission does not create a separate record outside the chat. Instead, the submitted values are posted back into the conversation so the assistant can keep working from that context.
Before you start
Make sure:
- you have edit access to the assistant
- the assistant already exists, or you are creating a new one
- you know what information you want to collect
- any requested file types are supported by Theta Assist
Quick way to create a form with another assistant
A quick way to create a form is to use one assistant to help you generate the form JSON, then import that form into the assistant where you want to use it.
Download the JSON schema
- Open the assistant you want to add the form to.
- Click Edit assistant.
- Click the Forms tab.
- Click the Download JSON schema icon.
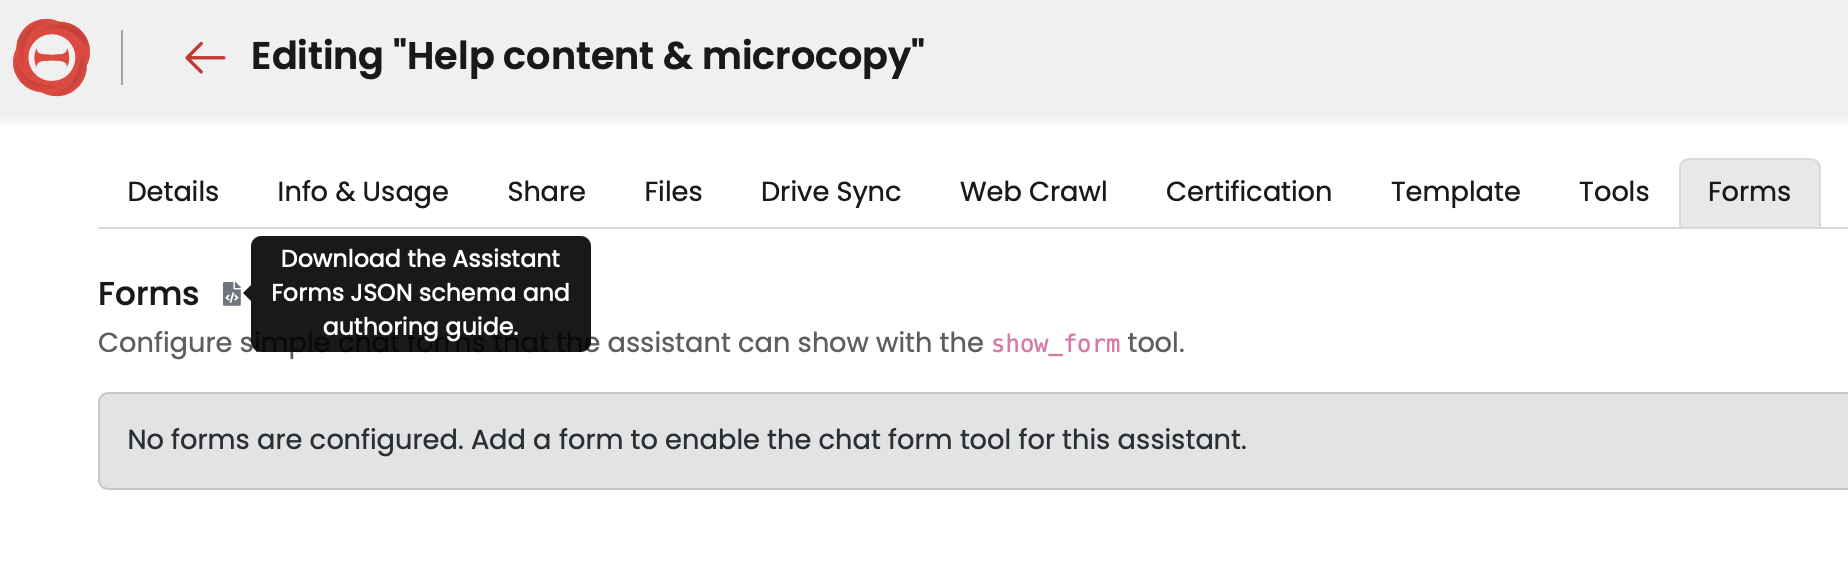
This downloads the Assistant Forms JSON schema and authoring guide, which you can use to help another assistant generate a valid form definition.
Use another assistant to generate the form
You can use another assistant to help draft the form. A general assistant will work fine for this.
- Open another assistant of your choice.
- Upload the JSON schema file to the chat.
- Tell the assistant:
- that you want to create a form
- the purpose of the form
- the information you want to collect
- Review the form JSON it generates.
- Ask the assistant to make any changes you need.
- When you are happy with it, download the JSON file.
You can also ask the assistant to generate a suitable system prompt for the assistant that will use the form.
Example prompt - travel booking
You can give the assistant a prompt like this:
Using this JSON schema, create a form for travel booking. Here is the info I need to know: project code (optional), travel purpose, destination, requested travel details: departure date, time, where to? return date, time, where to? do you need accommodation as well? any other requirements? Please return valid form JSON.
Add the form to your assistant
Once you have the JSON file:
- Open the assistant where you want to add the new form.
- Click Edit assistant.
- Navigate to the Forms tab.
- Click + Add form.
- Click the Upload button to import the JSON file you just created.
- Review the form fields and details.
- Click Save.
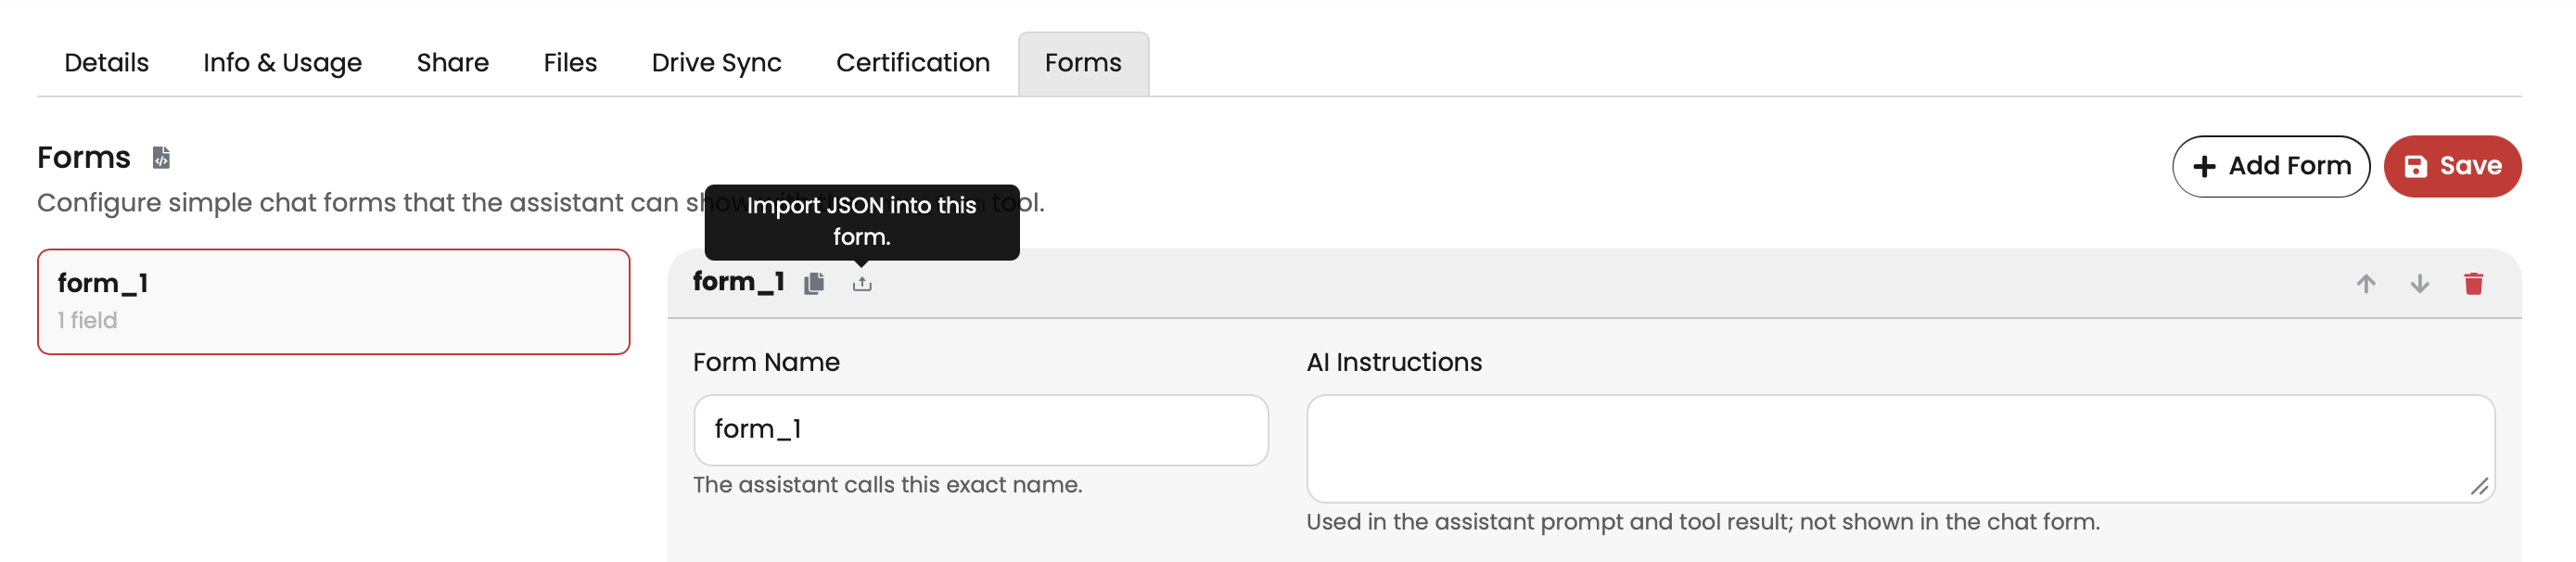
Important:
- importing JSON loads the form into the selected form slot
- if you are editing an existing form, importing will replace that form’s current contents
- always review the form name, instructions, and field settings before saving
Trigger a form with a quick prompt
If you want users to launch a form quickly, you can add a prompt button that triggers it.
Add a quick prompt
- Open the assistant.
- Click Edit assistant.
- Go to the Details tab.
- Click Add prompt.
- Enter a clear button label.
- In the prompt text field, enter the form name.
- Click Save.
This gives users a simple prompt button they can click to trigger the form.
Tips for quick prompt labels
Use labels that tell the user what the form is for, for example:
- Request travel
- Book a group trip
- Submit onboarding request
- Upload a document for review
Avoid using the raw form name as the button label unless it is already clear to end users.
Use separate forms for branching
If your workflow needs branching, the best approach is usually to create separate forms for each branch.
This is simpler to manage and easier for users to follow than trying to make one large form handle every scenario.
Example: travel workflow
In a travel example, you might create separate forms for:
- single traveller
- group booking
- international travel
- car booking request
You can then:
- offer the first 3 forms as starter prompt buttons
- offer the car booking request form after the first form is completed, if needed
This approach helps you:
- keep each form shorter
- ask only relevant questions
- reduce confusion
- make follow-up steps easier to control in the assistant instructions
When to split a form
Create separate forms when:
- different request types need different fields
- users only need one path at a time
- later questions depend on earlier answers
- you want different starter prompts for different tasks
Add and configure fields
Add the fields you want people to complete.
Supported field types
Theta Assist supports these field types:
- Text
- Textarea
- Number
- Select
- Checkbox
- URL
- Date
- Attachment
Common field settings
For each field, you can configure:
- Label — the name shown to the user
- Name — the identifier used in the submitted data
- Type — the field type
- Required — whether the field must be completed
- Help text — guidance shown under the field
- Placeholder — example text shown inside compatible fields
Field names must:
- use letters, numbers, and underscores only
- start with a letter or underscore
- be unique within the form
Type-specific options
Some fields have extra settings.
Number fields
You can set:
- minimum value
- maximum value
- step value
Date fields
You can choose:
- no default date
- prefill with today
- any date
- past dates only
- future dates only
- a custom minimum and maximum date
Select fields
You can:
- add multiple options
- set the display text
- optionally set a submitted value that is different from the display text
Attachment fields
You can:
- allow one file per field
- restrict accepted file extensions
- collect supporting files such as PDFs or CSVs
Choose how submissions work
When someone submits a form, Theta Assist posts the result back into the chat as a normal user message.
By default, the submission includes the form values in a structured format. The assistant can then read those values and continue.
If you add submission instructions with placeholders, Theta Assist can build the submitted message using those values instead.
For example, a submission template could turn form values into a more natural request for the assistant to act on.
Use forms with file uploads
Attachment fields let people upload a file as part of the form.
This is useful for:
- analysis requests
- document review
- approvals
- intake workflows
In an attended chat:
- The user selects a file.
- Theta Assist checks whether the file type is allowed.
- The file is uploaded when the form is submitted.
- The submitted message is added to the chat with the file attached.
If the file type is not supported, the user will need to choose a different file.
Use form outputs in follow-up actions
Once a form is submitted, Theta Assist can use the submitted values to complete follow-up actions.
Because the form response is added to the chat as a normal user message, the assistant can read the submitted fields and use them in the next step of the workflow.
Depending on the tools enabled for your assistant, you can use form outputs to trigger follow-up actions in Theta Assist and connected systems, including:
- create a draft email
- create a new Planner task
- send submitted data to another system using enabled MCP tools
- create or update records in connected tools
- summarise a request
- generate a document
- classify or route a request
- ask a follow-up question
- trigger another form
Form outputs are not limited to actions inside Theta Assist. If the right tools are enabled, the assistant can also pass submitted values into other systems to continue a workflow.
Create a draft email
A common use case is creating a draft email ready to review and send.
For example, a form could collect:
- recipient name
- recipient email
- subject
- message summary
- supporting details
- file attachments
The assistant can then use those submitted values to prepare a draft email for the user.
This works well for:
- approval requests
- customer follow-up
- internal handovers
- meeting summaries
- escalation emails
Notes:
- Images are not supported in draft emails created this way.
- If the Create Thread Share Link tool is enabled in the assistant, you can include a link back to the thread in the e-mail.

Create a new Planner task
You can also use form outputs to create a new Planner task.
For example, a form could collect:
- task title
- task description
- due date
- priority
- owner
- related links or notes
The assistant can then use that information to create a task for follow-up work.
The Planner task can also include a link to the originating thread.
This works well for:
- onboarding requests
- action items from meetings
- issue triage
- travel requests
- operational checklists
Trigger another form
A submitted form can also lead into another form.
This is useful when:
- the next step depends on the first response
- different request types need different follow-up questions
- you want to keep each form shorter and easier to complete
For example:
- a travel request form might lead to a car booking request form
- an intake form might lead to an approval form
- a project request form might lead to a document upload form
Design forms around the outcome
When creating a form, it helps to decide what the assistant should do after submission.
Ask yourself:
- Should the assistant draft an email?
- Should it create a task?
- Should it generate a file?
- Should it route the request to another workflow?
- Should it show another form?
If you know the outcome first, it is easier to choose the right fields and instructions.
Example uses
| Form purpose | Possible output |
|---|---|
| Travel request | Create a Planner task and show a follow-up form for car hire |
| Customer enquiry | Draft a reply email |
| Approval request | Draft an approval email with the submitted details |
| Document review | Summarise the request and attach the uploaded file |
| Onboarding request | Create a Planner task for the onboarding checklist |
Import or export a form
The Forms editor supports JSON import and export for individual forms.
Export a form
Use export when you want to:
- reuse a form in another assistant
- keep a backup
- edit the form definition outside Theta Assist
Import a form
Use import when you want to load a JSON form definition into the selected form.
Review the imported form before saving, especially:
- form name
- display instructions
- submission instructions
- field labels
- required fields
- attachment settings
Schema download
The Download JSON schema option gives you:
- a machine-readable schema
- authoring guidance
- a reliable way to create valid form JSON with another assistant
This is especially useful if you want an assistant to draft the form for you.
What happens in chat
In attended chats
In a normal chat with a person:
- The assistant triggers the form.
- The form appears in the conversation.
- The user completes and submits it.
- Theta Assist posts the submission back into the thread.
- The assistant continues from that submission.
In unattended runs
In unattended or background runs, Theta Assist cannot wait for someone to fill in a form.
Instead of showing an interactive form, the form definition is used as structured guidance for the run. Where information is missing, the run may need to rely on available context rather than user input.
Form availability in chat history
A form may become unavailable if:
- the thread is read-only
- the form has already been submitted
- the conversation has moved on
When this happens, the form can still stay visible in the thread, but it can no longer be submitted.
Limits and validation
Theta Assist validates forms when they are saved.
Key limits include:
- up to 20 forms per assistant
- up to 50 fields per form
- up to 50 options in a select field
- unique form names within an assistant
- unique field names within a form
Theta Assist also checks things like:
- required fields
- valid field types
- number ranges
- date rules
- allowed attachment extensions
Tips for writing good forms
- Use clear, specific field labels.
- Keep help text short and practical.
- Only ask for information the assistant actually needs.
- Use attachment fields when reviewing a file is part of the workflow.
- Test the form in chat before sharing the assistant with others.
- Use separate forms when different request types need different questions.
After completing the task
After you create your form:
- test it in a real chat
- check how the submitted message appears
- confirm the assistant responds correctly to the submitted values
- review any attachment restrictions before sharing the assistant
If you plan to reuse the form, export it after testing.