MCP servers | Admin guide
This guide explains how system administrators can set up and manage MCP servers in Theta Assist.
Use this guide when you want to make external tools or data sources available to assistant authors through the MCP Servers area in admin settings.
See also:
- Authentication configurations | Admin guide
- Adding tools and connectors to your assistant
- Access Profiles | Admin guide
- M365 Tools MCP server | Admin guide
- Planner MCP tool | Admin guide
Quick links
What MCP servers are
MCP servers let Theta Assist connect to external tools and data sources through the Model Context Protocol.
They are useful when there is no built-in connector, or you want assistants to do more than the standard built-in connectors support. For example, an MCP server may expose a wider set of actions, deeper access to a platform, or a custom business integration.
Admins create MCP server configurations centrally. Assistant authors can then enable the approved servers for their assistants.
Connectors vs MCP servers
Connectors and MCP servers both extend what assistants can do. This table outlines the differences between them:
| Option | Where admins set it up | Best for |
| Built-in connectors | Admin > Tools > Connectors | Standard integrations with simpler setup |
| MCP servers | Admin > Tools > MCP Servers | Broader, deeper, or custom tool access |
Use connectors when the built-in integration already meets your needs.
Use MCP servers when you need broader capability, more specialised actions, or a custom integration.
Types of MCP servers
There are two main types of MCP server in Theta Assist:
- Custom MCP servers that you add by entering an MCP endpoint URL.
- Built-in Theta Assist MCP servers that you can add from the available server list.
For example, M365 Tools and the Planner MCP tool are built-in Theta Assist MCP servers. You do not need to manually enter a custom endpoint URL for those.
Before you start
Before you add an MCP server, make sure:
- you are a system administrator in Theta Assist
- you know whether the server is a custom MCP server or a built-in Theta Assist MCP server
- you have any required authentication details ready, such as OAuth configuration or API credentials
- you know which users or groups should be allowed to add the server to assistants
For shared authentication setup guidance, see Authentication configurations | Admin guide.
Set up an MCP server
Open MCP server settings
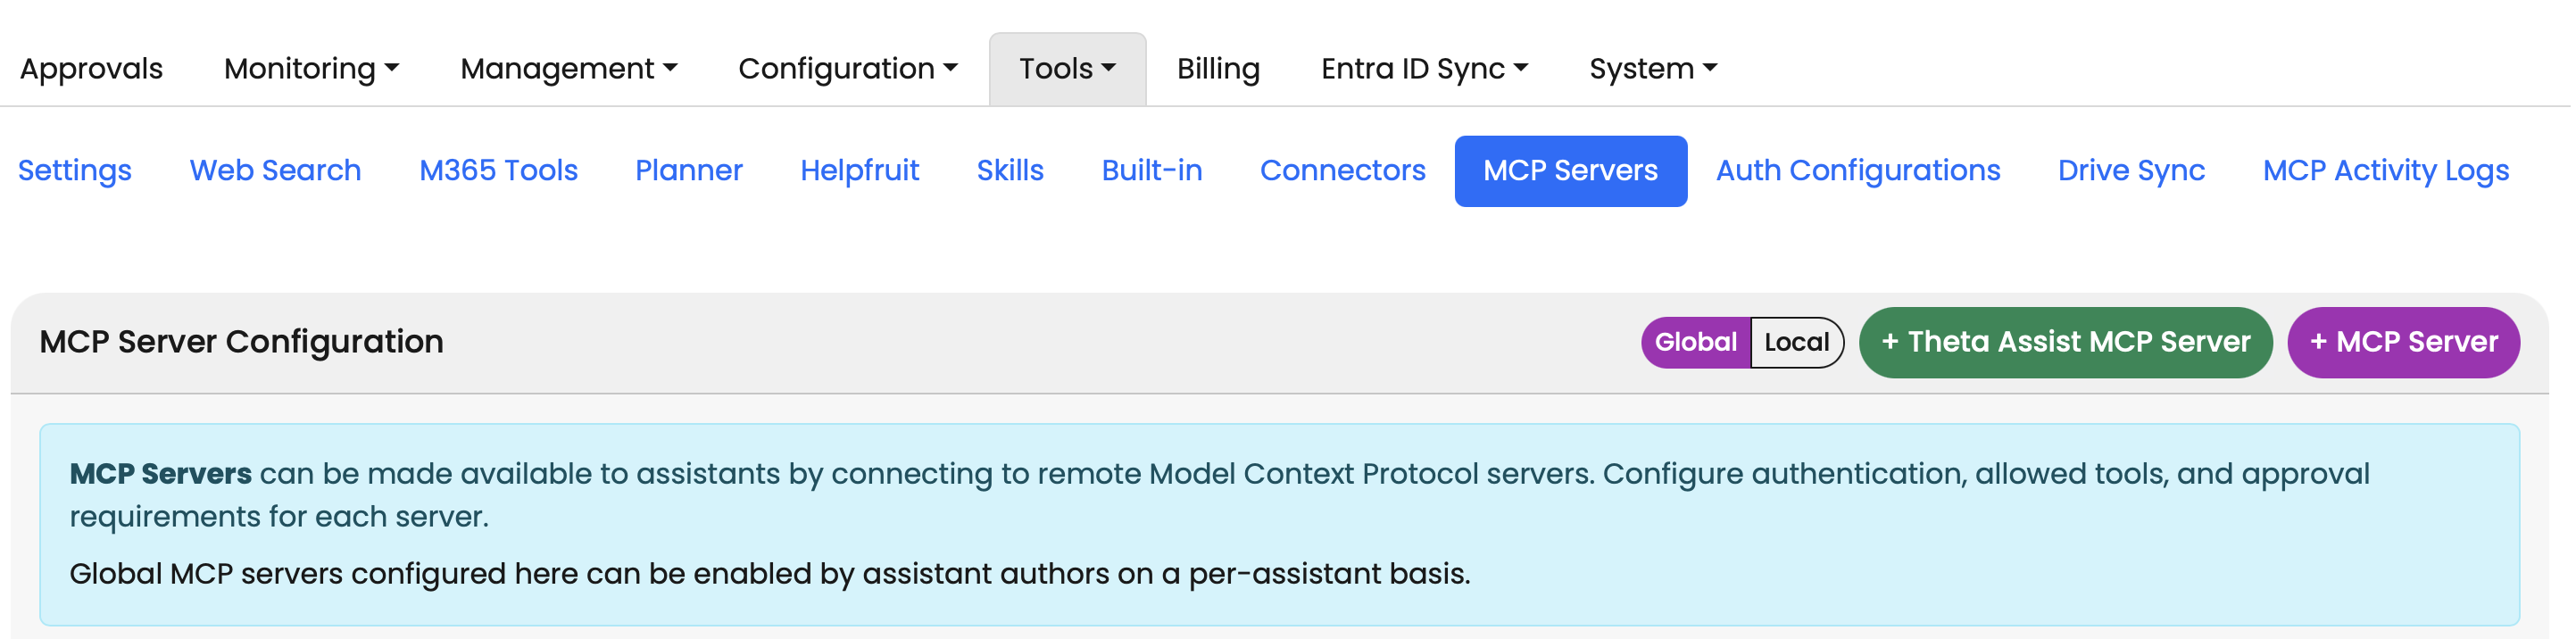
- Go to Admin > Tools > MCP Servers.
- Choose the option to add a server.
Add a custom MCP server
- Click Add MCP Server.
- Enter the Server URL.
- Enter a Server label. This is the unique identifier used internally.
- Enter a Server name. This is the display name users will see.
- Optionally add a Description.
- Optionally add Additional instructions to guide how the AI should use the server.
- If the server requires authentication, select the appropriate Auth Configuration.
- Set the Approval policy.
- If needed, restrict the available tools using Allowed Tools.
- Click Add Server.
Add a built-in Theta Assist MCP server
- Go to Admin > Tools > MCP Servers.
- Click the green + Theta Assist MCP Server button.
- Select the server you want to add.
- Attach the appropriate authentication configuration if required.
- Set the approval policy.
- Save your changes.
For Microsoft-specific setup, see M365 Tools MCP server | Admin guide.
For Planner-specific setup, see Planner MCP tool | Admin guide.
Manage access and approvals
Set an approval policy
Each MCP server can have its own approval policy.
- Never require approval lets tools run automatically.
- Always require approval requires the user to approve each tool call.
For initial rollout, it is usually safer to start with Always require approval.
Restrict who can add the server
You can control who can add a specific MCP server to assistants by assigning an Access Profile.
Add users or groups to the profile, then assign that profile to the MCP server.
This is useful when a server should only be available to a specific team or pilot group.
For more detail, see Access Profiles | Admin guide.
After you add a server
After the server is added:
- Ask an assistant author to open the assistant Tools tab.
- Enable the MCP server for the assistant.
- Test the assistant with a small pilot group first.
- Confirm authentication works as expected.
- Review approval prompts and tool behaviour.
If the server is user-authenticated, end users may see the wrench icon in the message box and may need to authenticate before use.
Troubleshooting
The server does not appear for assistant authors
Check that:
- the server was saved successfully
- the server is assigned to the correct Access Profile, if one is used
- the assistant author is allowed to use that profile
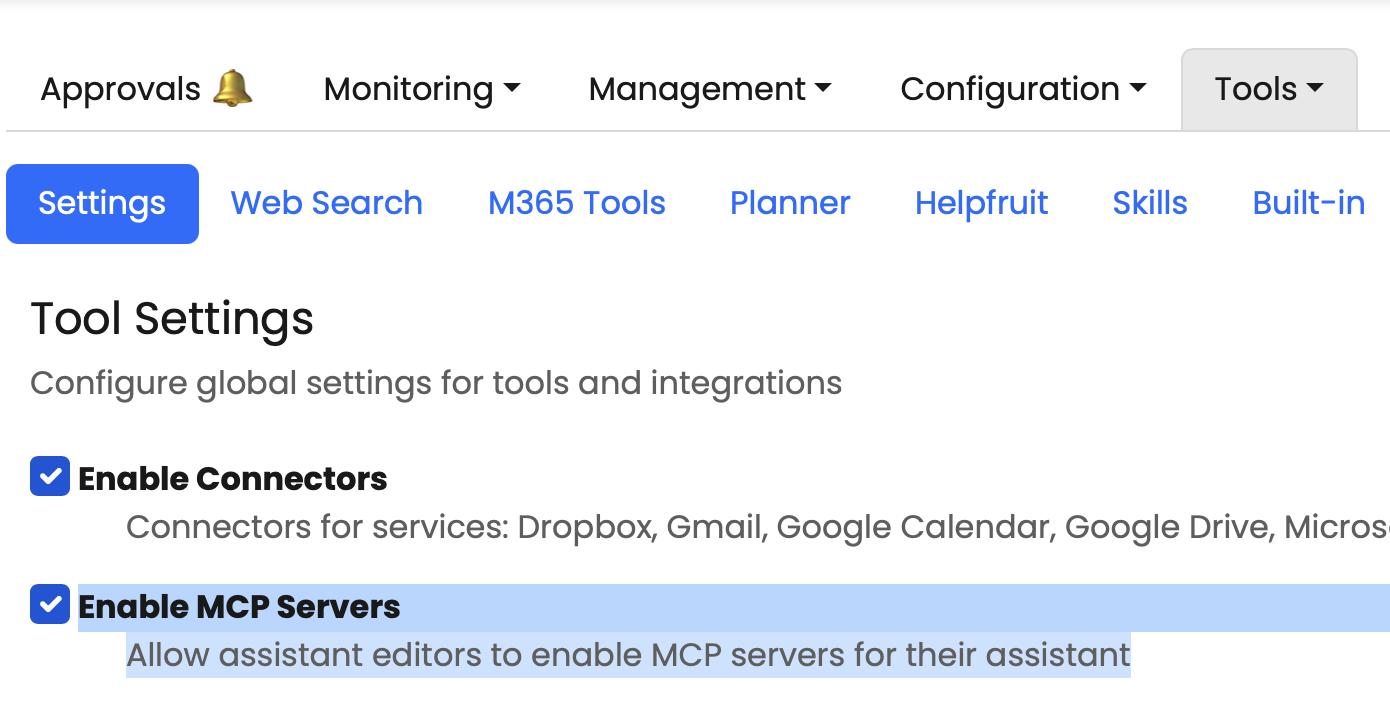
- the Enable MCP Servers setting is turned on in Admin > Tools > Settings
Authentication fails
Check that:
- the correct auth configuration is attached
- the client ID, secret, scopes, and redirect settings are correct
- the external provider has granted the required consent
Tool calls are not working as expected
Review the MCP server configuration, approval policy, and any additional instructions.
If needed, enable MCP Activity logs to help debug MCP calls.
Related guides
- Authentication configurations | Admin guide
- Adding tools and connectors to your assistant
- Access Profiles | Admin guide
- M365 Tools MCP server | Admin guide
- Planner MCP tool | Admin guide