How to create and configure a template document
Automate and standardise the creation of compliant and on-brand documents with templates in Theta Assist. Here's how it works:
- Create an assistant that will be used to create this type of document
- Create a template for this type of document in Word, with placeholders and relevant formatting/branding
- Upload your template
- Add placeholder descriptions in Theta Assist
- Customise the prompt to collect the info needed to populate the template, and instruct the assistant to export to file
Click-through demo of template creation
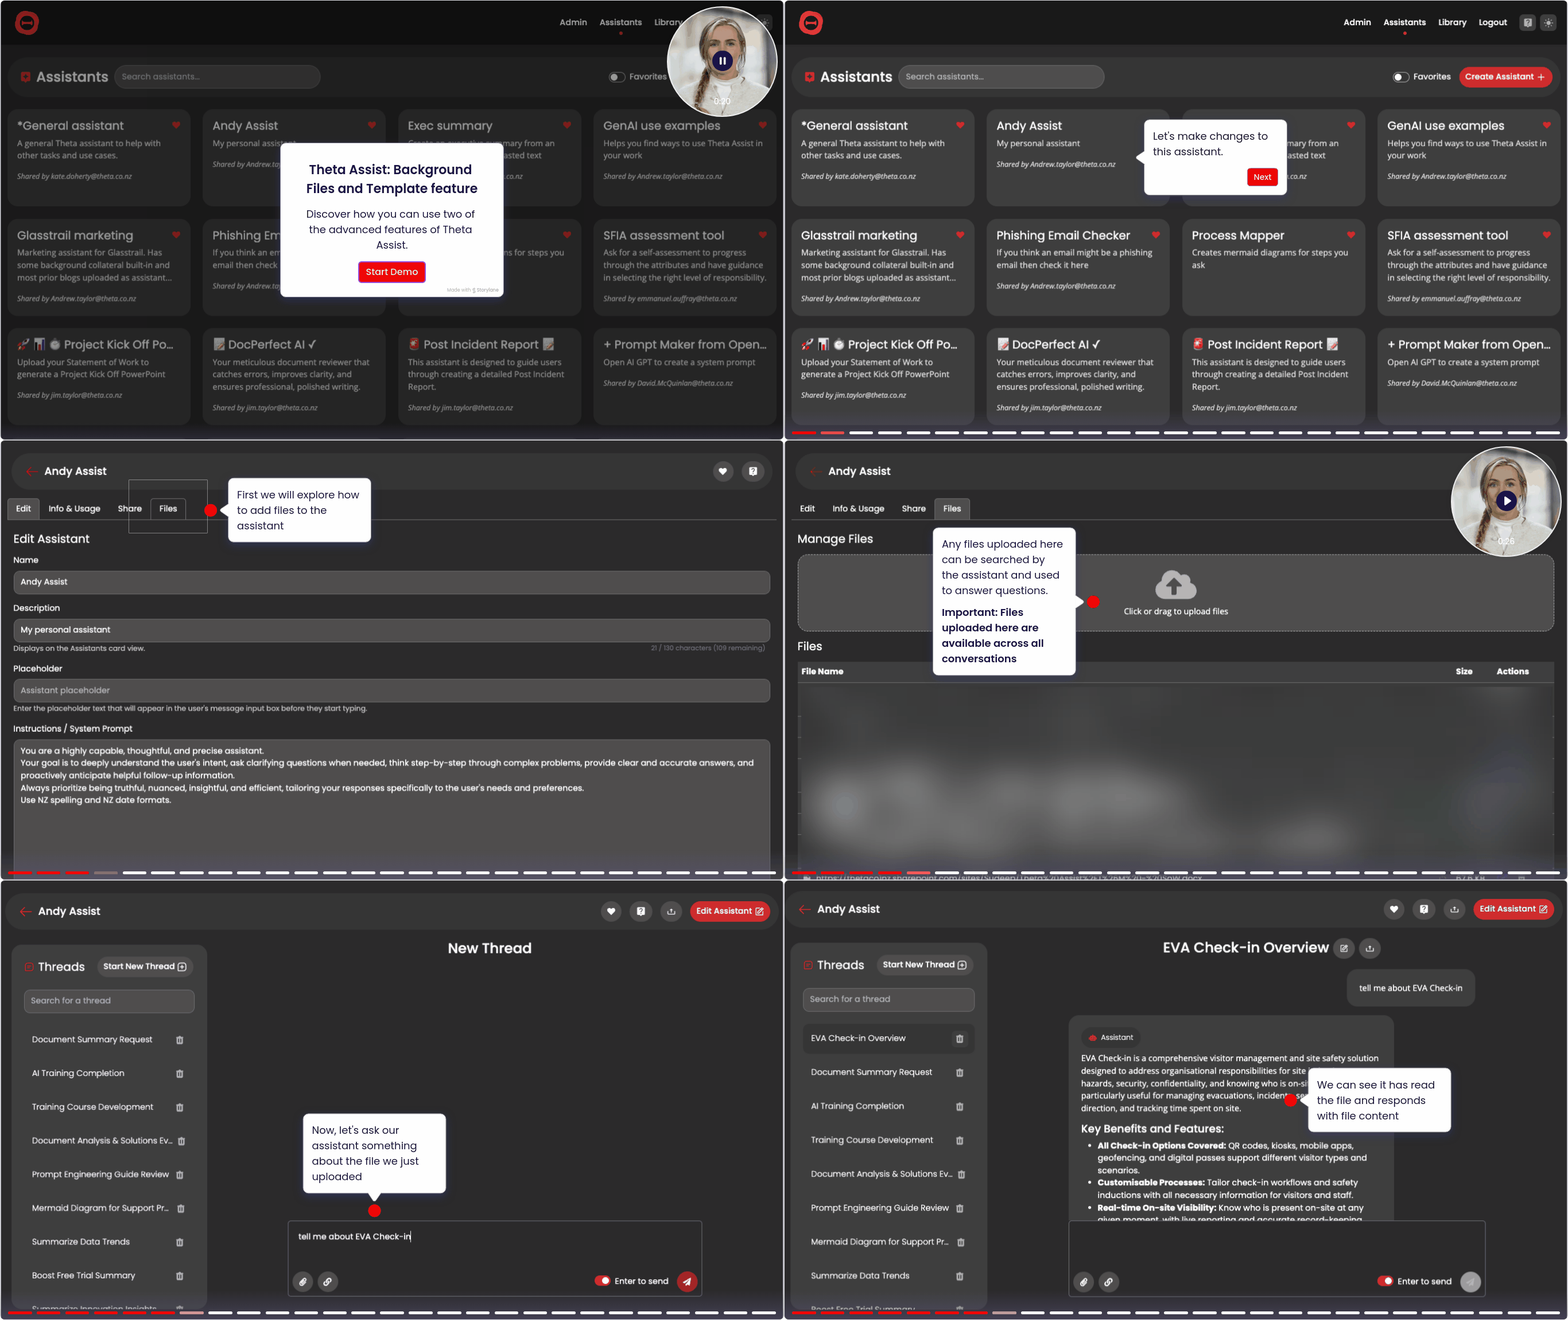
Step-by-step guide
1. Create an assistant
Follow the instructions here to create a new assistant. Give it a name that relates to the kind of document you want to create - eg Status Report Generator
2. Create your template
- Theta Assist supports the use of Word documents (.docx) as templates.
- Your template file can include any required organisation branding and formatting
- Templates should include any desired placeholders - see below
Configuring your template with placeholders
Placeholders mark locations in your Word document where AI-generated text will appear.
Placeholder format
Placeholders in your document should be in the format $placeholder - i.e. start with a $, followed by a-z, A-Z, 0-9, no spaces.
Default placeholders
The following placeholders are built into Theta Assist:
$fullname: Inserts the user's full name.$email: Inputs the user's email address.$assistantid:Adds the current assistant's unique identifier.$assistantname: Places the current assistant's display name.$threadid: Incorporates the current thread's unique identifier.$threadlink: Inserts the current thread's URL*
*Note the recipient of the document generated will only be able to access the thread if it has been shared with them
Custom placeholders
You can also add your own placeholders to your template, using the format $placeholder, anywhere you would like the Assistant to add text to your document.
3. Upload your template
- Edit the assistant you created in step one
- Navigate to the Template tab
- Upload your template
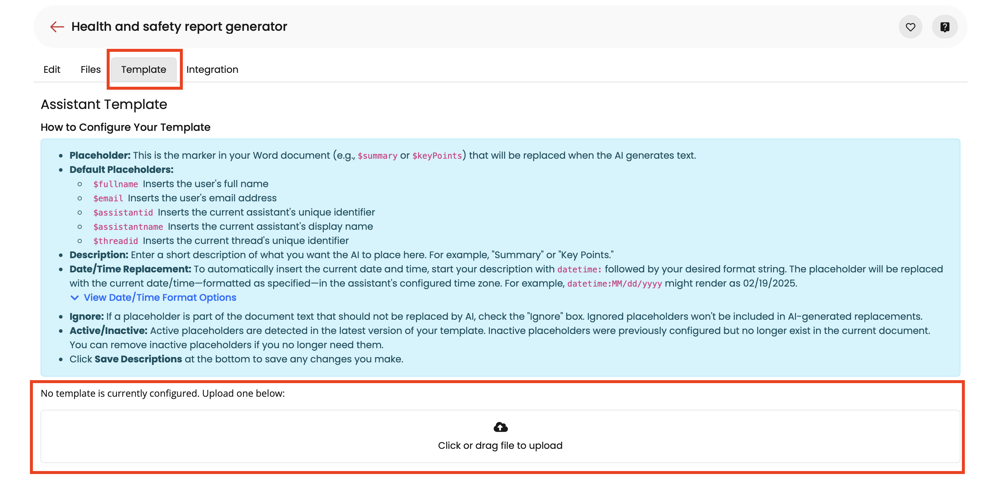
4. Customise placeholders
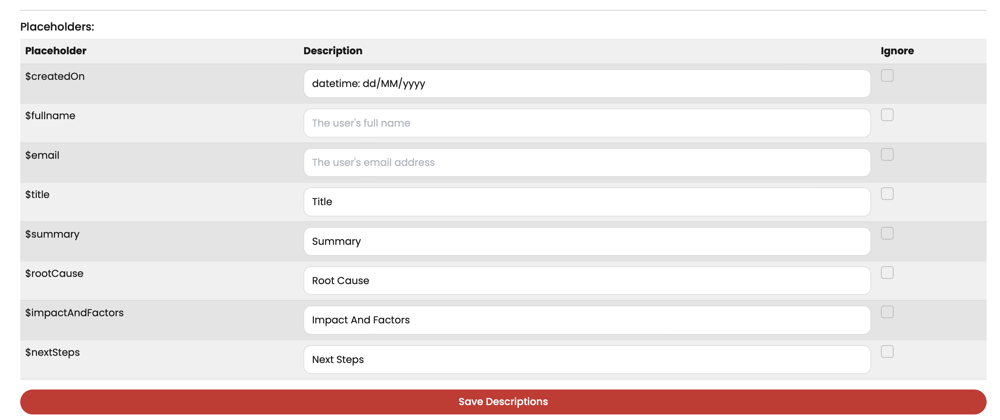
Theta Assist will automatically extract any placeholders included in your document.
Add a short description for each. This should describe what you want the Assistant to insert here - eg "Summary", "Next steps"
Date/time replacement
To add the current date/time, start your description with datetime: followed by your desired format string. The placeholder will be replaced with the current date/time—formatted as specified—in the assistant's configured time zone. For example, datetime:MM/dd/yyyy might render as 02/19/2025.
View date/time format options
| Code | Description | Example | Category |
|---|---|---|---|
| d | Day (1-31) | 5 | Date |
| dd | Day with leading zero (01-31) | 05 | Date |
| ddd | Abbreviated day name | Mon | Date |
| dddd | Full day name | Monday | Date |
| M | Month (1-12) | 9 | Date |
| MM | Month with leading zero (01-12) | 09 | Date |
| MMM | Abbreviated month name | Sep | Date |
| MMMM | Full month name | September | Date |
| y | Year as 1-2 digits | 23 | Date |
| yyyy | Full 4-digit year | 2023 | Date |
| h | Hour (1-12) | 3 | Time |
| hh | Hour with leading zero (01-12) | 03 | Time |
| H | 24-hour (0-23) | 15 | Time |
| HH | 24-hour with leading zero (00-23) | 15 | Time |
| m | Minute (0-59) | 9 | Time |
| mm | Minute with leading zero (00-59) | 09 | Time |
| s | Second (0-59) | 5 | Time |
| ss | Second with leading zero (00-59) | 05 | Time |
| tt | AM/PM indicator | PM | Time |
You can combine these format codes using any separators (/ - : etc) to create custom date/time formats.
Example Formats:
datetime:MM/dd/yyyy→ 01/24/2025datetime:MMMM d, yyyy→ January 24, 2025datetime:ddd, MMM d, yyyy h:mm tt→ Fri, Jan 24, 2025 3:30 PMdatetime:HH:mm:ss→ 15:30:00
Ignore setting
If any placeholders should remain as text and not be replaced by AI, check the "Ignore" box beside the placeholder. These won't be included in AI-generated text.
Completing the configuration
After configuring your placeholders and inserting necessary descriptions, click Save Descriptions at the bottom of the page to save your changes.
Updating your template
Missed a placeholder on want to change something? You can replace your existing template with a new one.
Active vs Inactive
Active Placeholders: These are currently used in the latest version of your template.
Inactive Placeholders: These are previously configured placeholders that no longer exist. Remove them if they are no longer needed.
5. Customise your prompt
Once your template is set up and configured, adjust the default prompt to collect the information required to populate your template.
IMPORTANT: You need to include an instruction in your prompt to use the 'save_to_file' function to export the contents of the file.
For example: "When complete, you'll save the full report using the save_to_file function." or "When complete, you'll save the output using the save_to_file function."